The community is working on translating this tutorial into Slovenian, but it seems that no one has started the translation process for this article yet. If you can help us, then please click "More info".
In this article series, we're building a complete Snake game from scratch. It makes sense to start with the Introduction and then work your way through the articles one by one, to get the full understanding.
If you want to get the complete source code for the game at once, to get started modifying and learning from it right now, consider downloading all our samples!
Continuous movement with DispatcherTimer
In the previous articles, we created a nice looking game area for our Snake and then we added code to perform the actual creation and movement of the snake. However, as already mentioned, the code for movement is not something that should be called just once - instead, it should be called again and again, to keep the snake moving as long as the game is running. In other words, we'll need a Timer.
Generally speaking, in programming, a Timer is usually a mechanism that will allow for a task to be repeated again and again, based on an interval. In other words, each time the timer "ticks", a piece of code is executed, and the timer ticks based on the defined interval. This is exactly what we need to keep our snake moving, so we'll add a DispatcherTimer to our Window:
public partial class SnakeWPFSample : Window
{
    private System.Windows.Threading.DispatcherTimer gameTickTimer = new System.Windows.Threading.DispatcherTimer();
    ....
With that in place, we now need to subscribe to its one and only event: The Tick event. We'll do it in the constructor of the Window:
public SnakeWPFSample()
{
    InitializeComponent();
    gameTickTimer.Tick += GameTickTimer_Tick;
}
And here's the implementation of the event:
private void GameTickTimer_Tick(object sender, EventArgs e)
{
    MoveSnake();
}
So, each time the timer ticks, the Tick event is called, which in return calls the MoveSnake() method that we implemented previously. To finally see the result of all our hard labor and have a visual, moving snake, we basically just have to create the initial snake parts and then start the timer. We'll create a method called StartNewGame(), which we'll use for starting both the first game as well as any number of additional new games when the player dies. We'll start with a very basic version of it though, and then I will expand it with more functionality as we move along - for now, let's just get this snake moving!
First step is to add yet another set of constants, which we'll use to start the new game:
public partial class SnakeWPFSample : Window
{
    const int SnakeSquareSize = 20;
    const int SnakeStartLength = 3;
    const int SnakeStartSpeed = 400;
    const int SnakeSpeedThreshold = 100;
    ......
Only the first three constants are used at this point, to control size, length and start speed of the Snake. We'll use the SnakeSpeedThreshold later, but for now, let's add a simple implementation of the StartNewGame() method as promised:
private void StartNewGame()
{
    snakeLength = SnakeStartLength;
    snakeDirection = SnakeDirection.Right;
    snakeParts.Add(new SnakePart() { Position = new Point(SnakeSquareSize * 5, SnakeSquareSize * 5) });
    gameTickTimer.Interval = TimeSpan.FromMilliseconds(SnakeStartSpeed);

    // Draw the snake
    DrawSnake();

    // Go!
    gameTickTimer.IsEnabled = true;
}
We start off by setting the snakeLength and snakeDirection based on initial values. Then we add a single part to the snakeParts List (more on that later), giving it a nice start position for moving right - we'll once again use the SnakeSquareSize constant to help calculate the proper position. With that in place, we can draw the snake by calling the DrawSnake() method and then enable the timer, which will basically start the movement of the snake.
We're now finally at the point where we can almost sit back and enjoy the very first version of something that actually looks like a game - in fact, all we have to do now is to call the StartNewGame() method. This should of course be done when the user is ready, but for now, to check that everything works, we'll simply do it as soon as everything else is initialized - we'll once again rely on the ContentRendered event of the Window, which we added in one of the first articles. Simply add a call to our StartNewGame() method and we're finally ready to compile and run:
private void Window_ContentRendered(object sender, EventArgs e)
{
    DrawGameArea();
    StartNewGame();
}
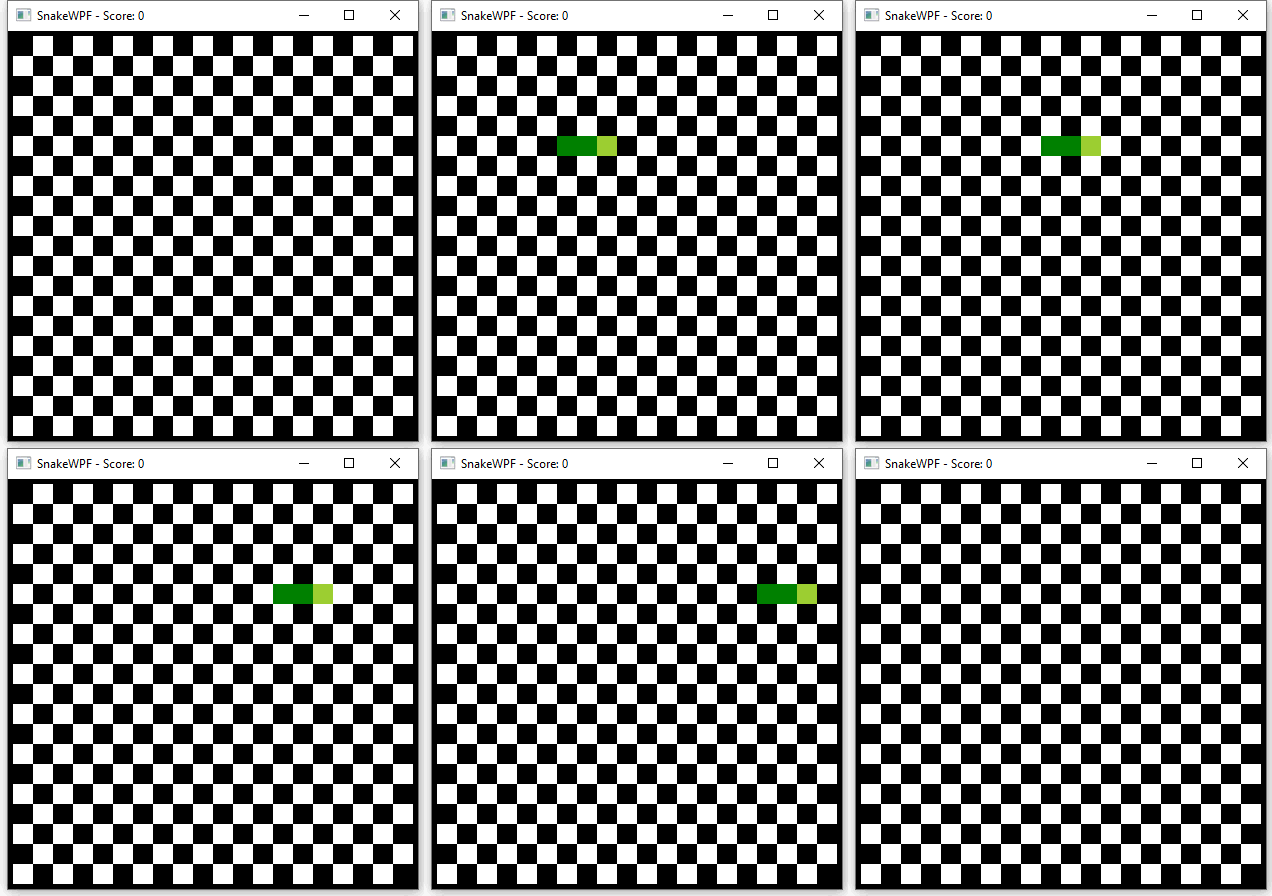
If you did everything as described, you should now be able to start the game and see the snake being created and immediately start moving:

Notice how the snake appears from out of nothing, as a single square, and then grows to a length of three squares. That happens because we only add one part to the snakeParts list, but each time the MoveSnake() method is called by the timer, a new part is added (to make it grow), while only removing tail-parts if the current length is about to exceed the desired length of the snake, which starts at 3 (decided by the SnakeStartLength constant).
Summary
We now have a moving snake, which is really awesome! But as you can see from the animated image above, there are still things to be done - there's no food for the snake to eat, and when the snake hits the wall, nothing happens. We'll work on these aspects in the next articles.