The community is working on translating this tutorial into Afar, but it seems that no one has started the translation process for this article yet. If you can help us, then please click "More info".
The OpenFileDialog
Whenever you open or save a file in almost any Windows application, you will see roughly the same dialogs for doing that. The reason is of course that these dialogs are a part of the Windows API and therefore also accessible to developers on the Windows platform.
For WPF, you will find standard dialogs for both opening and saving files in the Microsoft.Win32 namespace. In this article we'll focus on the OpenFileDialog class, which makes it very easy to display a dialog for opening one or several files.
Simple OpenFileDialog example
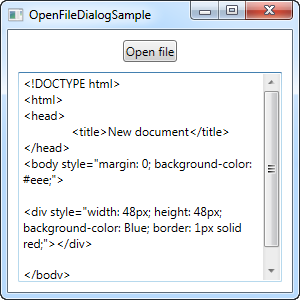
Let's start off by using the OpenFileDialog without any extra options, to load a file to a TextBox control:
<Window x:Class="WpfTutorialSamples.Dialogs.OpenFileDialogSample"
        xmlns="http://schemas.microsoft.com/winfx/2006/xaml/presentation"
        xmlns:x="http://schemas.microsoft.com/winfx/2006/xaml"
        Title="OpenFileDialogSample" Height="300" Width="300">
    <DockPanel Margin="10">
        <WrapPanel HorizontalAlignment="Center" DockPanel.Dock="Top" Margin="0,0,0,10">
            <Button Name="btnOpenFile" Click="btnOpenFile_Click">Open file</Button>
        </WrapPanel>
        <TextBox Name="txtEditor" />
    </DockPanel>
</Window>
using System;
using System.IO;
using System.Windows;
using Microsoft.Win32;
namespace WpfTutorialSamples.Dialogs
{
public partial class OpenFileDialogSample : Window
{
public OpenFileDialogSample()
{
InitializeComponent();
}
private void btnOpenFile_Click(object sender, RoutedEventArgs e)
{
OpenFileDialog openFileDialog = new OpenFileDialog();
if(openFileDialog.ShowDialog() == true)
txtEditor.Text = File.ReadAllText(openFileDialog.FileName);
}
}
}
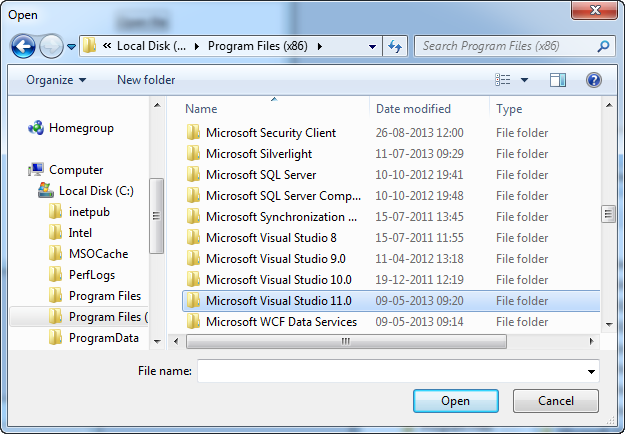
Once you click the Open file button, the OpenFileDialog will be instantiated and shown. Depending on which version of Windows you're using and the theme selected, it will look something like this:

The ShowDialog() will return a nullable boolean value, meaning that it can be either false, true or null. If the user selects a file and presses "Open", the result is True, and in that case, we try to load the file into the TextBox control. We get the complete path of the selected file by using the FileName property of the OpenFileDialog.
Filter
Normally when you want your user to open a file in your application, you want to limit it to one or a couple of file types. For instance, Word mostly opens Word file (with the extension .doc or .docx) and Notepad mostly open text files (with the extension .txt).
You can specify a filter for your OpenFileDialog to indicate to the user which types of file they should be opening in your application, as well as limiting the files shown for a better overview. This is done with the Filter property, which we can add to the above example, right after initializing the dialog, like this:
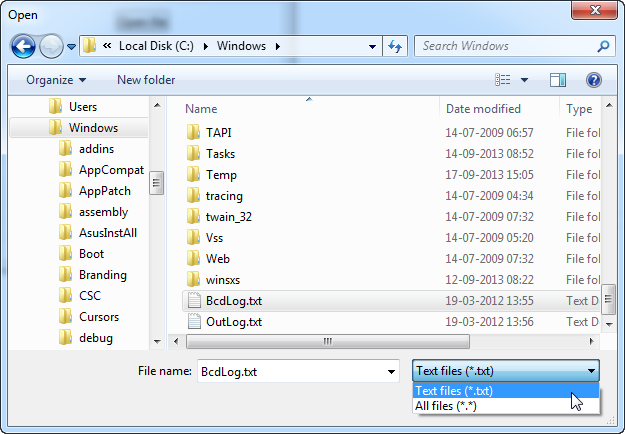
openFileDialog.Filter = "Text files (*.txt)|*.txt|All files (*.*)|*.*";Here's the result:

Notice how the dialog now has a combo box for selecting the file types, and that the files shown are limited to ones with the extension(s) specified by the selected file type.
The format for specifying the filter might look a bit strange at first sight, but it works by specifying a human-readable version of the desired file extension(s) and then one for the computer to easily parse, separated with a pipe (|) character. If you want more than one file type, as we do in the above example, each set of information are also separated with a pipe character.
So to sum up, the following part means that we want the file type to be named "Text files (*.txt)" (the extension in the parenthesis is a courtesy to the user, so they know which extension(s) are included) and the second part tells the dialog to show files with a .txt extension:
Text files (*.txt)|*.txtEach file type can of course have multiple extensions. For instance, image files could be specified as both JPEG and PNG files, like this:
openFileDialog.Filter = "Image files (*.png;*.jpeg)|*.png;*.jpeg|All files (*.*)|*.*";Simply separate each extension with a semicolon in the second part (the one for the computer) - in the first part, you can format it the way you want to, but most developers seem to use the same notation for both parts, as seen in the example above.
Setting the initial directory
The initial directory used by the OpenFileDialog is decided by Windows, but by using the InitialDirectory property, you can override it. You will usually set this value to a user specified directory, the application directory or perhaps just to the directory last used. You can set it to a path in a string format, like this:
openFileDialog.InitialDirectory = @"c:\temp\";If you want to use one of the special folders on Windows, e.g. the Desktop, My Documents or the Program Files directory, you have to take special care, since these may vary from each version of Windows and also be dependent on which user is logged in. The .NET framework can help you though, just use the Environment class and its members for dealing with special folders:
openFileDialog.InitialDirectory = Environment.GetFolderPath(Environment.SpecialFolder.MyDocuments);In this case, I get the path for the My Documents folder, but have a look at the SpecialFolder enumeration - it contains values for a lot of interesting paths. For a full list, please see this MSDN article.
Multiple files
If your application supports multiple open files, or you simply want to use the OpenFileDialog to select more than one file at a time, you need to enable the Multiselect property. In the next example, we've done just that, and as a courtesy to you, dear reader, we've also applied all the techniques mentioned above, including filtering and setting the initial directory:
<Window x:Class="WpfTutorialSamples.Dialogs.OpenFileDialogMultipleFilesSample"
        xmlns="http://schemas.microsoft.com/winfx/2006/xaml/presentation"
        xmlns:x="http://schemas.microsoft.com/winfx/2006/xaml"
        Title="OpenFileDialogMultipleFilesSample" Height="300" Width="300">
    <DockPanel Margin="10">
        <WrapPanel HorizontalAlignment="Center" DockPanel.Dock="Top" Margin="0,0,0,10">
            <Button Name="btnOpenFile" Click="btnOpenFiles_Click">Open files</Button>
        </WrapPanel>
        <ListBox Name="lbFiles" />
    </DockPanel>
</Window>
using System;
using System.IO;
using System.Windows;
using Microsoft.Win32;
namespace WpfTutorialSamples.Dialogs
{
public partial class OpenFileDialogMultipleFilesSample : Window
{
public OpenFileDialogMultipleFilesSample()
{
InitializeComponent();
}
private void btnOpenFiles_Click(object sender, RoutedEventArgs e)
{
OpenFileDialog openFileDialog = new OpenFileDialog();
openFileDialog.Multiselect = true;
openFileDialog.Filter = "Text files (*.txt)|*.txt|All files (*.*)|*.*";
openFileDialog.InitialDirectory = Environment.GetFolderPath(Environment.SpecialFolder.MyDocuments);
if(openFileDialog.ShowDialog() == true)
{
foreach(string filename in openFileDialog.FileNames)
lbFiles.Items.Add(Path.GetFileName(filename));
}
}
}
}
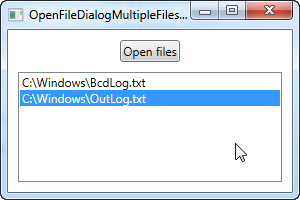
If you test this code, you will see that you can now select multiple files in the same directory, by holding down either Ctrl orShift and clicking with the mouse. Once accepted, this example simply adds the filenames to the ListBox control, by looping through the FileNames property.
Summary
As you can see, using the OpenFileDialog in WPF is very easy and really takes care of a lot of work for you. Please be aware that to reduce the amount of code lines, no exception handling is done in these examples. When working with files and doing IO tasks in general, you should always look out for exceptions, as they can easily occur due to a locked file, non-existing path or related problems.