The community is working on translating this tutorial into Slovenian, but it seems that no one has started the translation process for this article yet. If you can help us, then please click "More info".
Access Keys
The concept of Access Keys, sometimes referred to as Accelerator Keys or Keyboard Accelerators, allows you to reach a specific control inside a window by holding down the Alt key and then pressing another key on the keyboard. This enhances the usability of your windows, because it allows the user to use their keyboard to navigate the window, instead of having to use the mouse.
Defining Access Keys
Defining access keys for your WPF control is very easy, but the method might surprise you a bit. Normally, there would be a property for this, but not for Access Keys. Instead, you define the Access Key by prefixing the letter with an underscore in the Text/Content property of the control. For instance, like this:
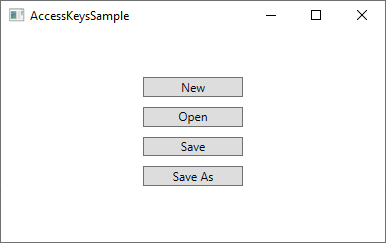
<Button Content="_New"></Button>Notice the underscore (_) just before the N character - this will turn the N key into the designated Access Key for this Button control. By default, the look of your control(s) doesn't change, as you can see from this example where I have defined Access Keys for all the buttons:

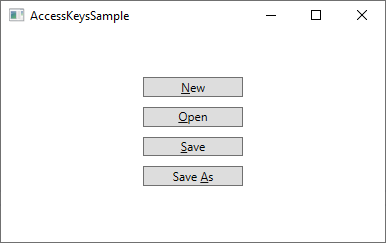
However, as soon as you press the Alt key on your Keyboard, the available Access Keys are highlighted by underlining them:

While holding the Alt key down, you can now press one of the Access Keys (e.g. N, O or S) to activate the specific button. It will react as if it was clicked with the mouse.
Access Keys are fine for single elements in a dialog/window, but they are even more useful in the traditional Windows Menus, where you will usually need to click your way through a hierarchy of menu items before reaching the one you need. Here's an example from Visual Studio:

In this case, instead of having to navigate through the menu with several mouse moves and clicks when I want to start a new Project, I can hold down the Alt key and then press F (for File), then N (for New) and then P (for Project). Sure, this could also have been accomplished with the regular keyboard shortcut (Ctrl+Shift+N), but that shortcut is not visible until you reach the last level of the menu hierarchy, so unless you have it memorized already, it might be easier to use the Access Keys, since they are visually highlighted as soon as you press the Alt key.
Which character(s) should be used as Access Keys?
You might be tempted to just use any of the characters found in the control text/content, but there are actually guidelines for picking the right character. The most important rule is of course to pick a character not used by another control already, but in addition to that, you should use the following guidelines:
- Use the first character of the first word
- If that's not possible, use the first character of the second or third word (e.g. the A in Save As)
- If that's not possible, use the second character of the first word (e.g. P in Open)
- If that's not possible, use the second character of the second or third word (e.g. the l in Save All)
- In general, you may want to avoid narrow characters like i and l, and go for the wider characters like m, s, w etc.
Tying together two controls
In the examples we have seen so far, we have been able to define the Access Key directly on the control we want to reach. But there's at least one example where this isn't directly possible: When you have an input control, e.g. a TextBox, the text that indicate its purpose doesn't exist within the actual TextBox control. Instead, you would usually use a second control to indicate, with text, the purpose of the TextBox control. This would usually be a Label control.
So, in this example, the Label control would then hold the descriptive text, and therefore also the Access Key, but the control you want to give attention to would be the TextBox control. No problem - we can use the Target property of the Label to tie it together with the TextBox (or any other control), like this:
<StackPanel Margin="20">
    <Label Content="_First name:" Target="{Binding ElementName=txtFirstName}" />
    <TextBox Name="txtFirstName" />
    <Label Content="_Last name:" Target="{Binding ElementName=txtLastName}" />
    <TextBox Name="txtLastName" />
    <Button Content="_Save" Margin="20"></Button>
</StackPanel>
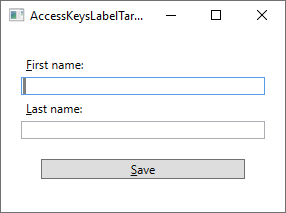
Notice how the Access Key is specified for the Label controls and then tied to the relevant TextBox control using the Target property, where we use an ElementName based Binding to do the actual work. Now we can access the two TextBox controls using Alt+F and Alt+L, and the Button with Alt+S. Here's how it looks:

Summary
By using Access Keys in your windows/dialogs, you are making it much easier for people to navigate using only their keyboards. This is especially popular among power-users, who will use the keyboard in favor of the mouse as much as possible. You should always use Access Keys, especially for your menus.