The community is working on translating this tutorial into Marathi, but it seems that no one has started the translation process for this article yet. If you can help us, then please click "More info".
Hello, WPF!
The first and very classic example in pretty much any programming tutorial is the "Hello, world!" example, but in this tutorial we'll go nuts and change that into "Hello, WPF!" instead. The goal is simply to get this piece of text onto the screen, to show you how easy it is to get started.
The rest of this tutorial assumes that you have an IDE installed, preferably Visual Studio or Visual Studio Community (see the previous article for instructions on how to get it). If you're using another product, you will have to adapt the instructions to your product.
In Visual Studio, start by selecting New project from the File menu. On the left, you should have a tree of categories. This tutorial will focus on C# whenever code is involved, so you should select that from the list of templates, and since we'll be creating Windows applications, you should select Windows from the tree. This will give you a list of possible Windows application types to the right, where you should select a WPF Application. I named my project "HelloWPF" in the Name text field. Make sure that the rest of the settings in the bottom part of the dialog are okay and then press the Ok button.
Your new project will have a couple of files, but we will focus on just one of them now: MainWindow.xaml. This is the applications primary window, the one shown first when launching the application, unless you specifically change this. The XAML code found in it (XAML is discussed in details in another chapter of this tutorial) should look something like this:
<Window x:Class="WpfApplication1.MainWindow"
    xmlns="http://schemas.microsoft.com/winfx/2006/xaml/presentation"
    xmlns:x="http://schemas.microsoft.com/winfx/2006/xaml"
    Title="MainWindow" Height="350" Width="525">
    <Grid>

    </Grid>
</Window>
This is the base XAML that Visual Studio creates for our window, all parts of it explained in the chapters on XAML and "The Window". You can actually run the application now (select Debug -> Start debugging or press F5) to see the empty window that our application currently consists of, but now it's time to get our message on the screen.
We'll do it by adding a TextBlock control to the Grid panel, with our aforementioned message as the content:
<Window x:Class="WpfApplication1.MainWindow"
    xmlns="http://schemas.microsoft.com/winfx/2006/xaml/presentation"
    xmlns:x="http://schemas.microsoft.com/winfx/2006/xaml"
    Title="MainWindow" Height="350" Width="525">
    <Grid>
        <TextBlock HorizontalAlignment="Center" VerticalAlignment="Center" FontSize="72">
            Hello, WPF!
        </TextBlock>
    </Grid>
</Window>
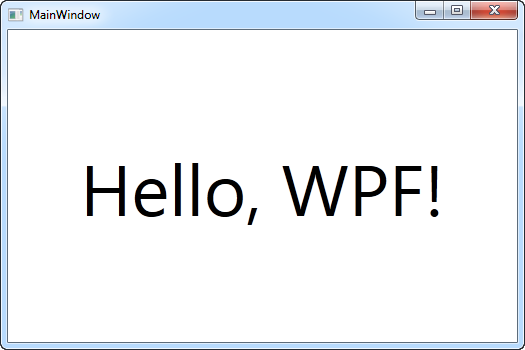
Try running the application now (select Debug -> Start debugging or press F5) and see the beautiful result of your hard work - your first WPF application:

You will notice that we used three different attributes on the TextBlock to get a custom alignment (in the middle of the window), as well the FontSize property to get bigger text. All of these concepts will be treated in later articles.
Congratulations on making it this far. Now go read the rest of the tutorial and soon you will master WPF!