The community is working on translating this tutorial into isiZulu, but it seems that no one has started the translation process for this article yet. If you can help us, then please click "More info".
The DispatcherTimer
In WinForms, there's a control called the Timer, which can perform an action repeatedly within a given interval. WPF has this possibility as well, but instead of an invisible control, we have the DispatcherTimer control. It does pretty much the same thing, but instead of dropping it on your form, you create and use it exclusively from your Code-behind code.
The DispatcherTimer class works by specifying an interval and then subscribing to the Tick event that will occur each time this interval is met. The DispatcherTimer is not started before you call the Start() method or set the IsEnabled property to true.
Let's try a simple example where we use a DispatcherTimer to create a digital clock:
<Window x:Class="WpfTutorialSamples.Misc.DispatcherTimerSample"
        xmlns="http://schemas.microsoft.com/winfx/2006/xaml/presentation"
        xmlns:x="http://schemas.microsoft.com/winfx/2006/xaml"
        Title="DispatcherTimerSample" Height="150" Width="250">
    <Grid>
        <Label Name="lblTime" FontSize="48" HorizontalAlignment="Center" VerticalAlignment="Center" />
    </Grid>
</Window>
using System;
using System.Windows;
using System.Windows.Threading;
namespace WpfTutorialSamples.Misc
{
public partial class DispatcherTimerSample : Window
{
public DispatcherTimerSample()
{
InitializeComponent();
DispatcherTimer timer = new DispatcherTimer();
timer.Interval = TimeSpan.FromSeconds(1);
timer.Tick += timer_Tick;
timer.Start();
}
void timer_Tick(object sender, EventArgs e)
{
lblTime.Content = DateTime.Now.ToLongTimeString();
}
}
}
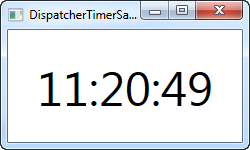
The XAML part is extremely simple - it's merely a centered label with a large font size, used to display the current time.
Code-behind is where the magic happens in this example. In the constructor of the window, we create a DispatcherTimer instance. We set the Interval property to one second, subscribe to the Tick event and then we start the timer. In the Tick event, we simply update the label to show the current time.
Of course, the DispatcherTimer can work at smaller or much bigger intervals. For instance, you might only want something to happen every 30 seconds or 5 minutes - just use the TimeSpan.From* methods, like FromSeconds or FromMinutes, or create a new TimeSpan instance that completely fits your needs.
To show what the DispatcherTimer is capable of, let's try updating more frequently... A lot more frequently!
using System;
using System.Windows;
using System.Windows.Threading;

namespace WpfTutorialSamples.Misc
{
	public partial class DispatcherTimerSample : Window
	{
		public DispatcherTimerSample()
		{
			InitializeComponent();
			DispatcherTimer timer = new DispatcherTimer();
			timer.Interval = TimeSpan.FromMilliseconds(1);
			timer.Tick += timer_Tick;
			timer.Start();
		}

		void timer_Tick(object sender, EventArgs e)
		{
			lblTime.Content = DateTime.Now.ToString("HH:mm:ss.fff");
		}
	}
}
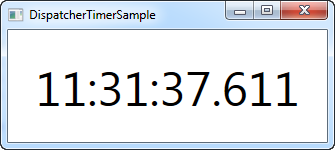
As you can see, we now ask the DispatcherTimer to fire every millisecond! In the Tick event, we use a custom time format string to show the milliseconds in the label as well. Now you have something that could easily be used as a stopwatch - just add a couple of buttons to the Window and then have them call the Stop(), Start() and Restart() methods on the timer.
Summary
There are many situations where you would need something in your application to occur at a given interval, and using the DispatcherTimer, it's quite easy to accomplish. Just be aware that if you do something complicated in your Tick event, it shouldn't run too often, like in the last example where the timer ticks each millisecond - that will put a heavy strain on the computer running your application.
Also be aware that the DispatcherTimer is not 100% precise in all situations. The tick operations are placed on the Dispatcher queue, so if the computer is under a lot of pressure, your operation might be delayed. The .NET framework promises that the Tick event will never occur too early, but can't promise that it won't be slightly delayed. However, for most use cases, the DispatcherTimer is more than precise enough.
If you need your timer to have a higher priority in the queue, you can set the DispatcherPriority by sending one of the values along on the DispatcherTimer priority. More information about it can be found on this MSDN article.