This article is currently in the process of being translated into Tamil (~57% done).
Using WPF styles
முந்தைய அத்தியாயத்தில், Styleன் கருத்தை நாங்கள் அறிமுகப்படுத்தினோம், உள்ளிருப்பு வரையறுக்கப்பட்ட பாணியின் மிக அடிப்படையான உதாரணத்தைப் பயன்படுத்தினோம். இது TextBlock கட்டுப்பாட்டை குறிவைத்தது. இருப்பினும், பாணிகளை பல்வேறு நோக்கங்களில் வரையறுக்கலாம். அவற்றை எங்கு, எப்படிப் பயன்படுத்த விரும்புகிறீர்கள் என்பதைப் பொறுத்து, நீங்கள் வெளிப்படையாக விரும்பும் கட்டுப்பாடுகளில் மட்டுமே பாணிகளைப் பயன்படுத்தக் கூட கட்டுப்படுத்தலாம். இந்த அத்தியாயத்தில், ஒரு பாணியை வரையறுக்கக்கூடிய அனைத்து வழிகளையும் நான் உங்களுக்குக் காண்பிப்பேன்.
Local control specific style
இது போன்ற ஒரு கட்டுப்பாட்டில் நீங்கள் நேரடியாக ஒரு பாணியை வரையறுக்கலாம்:
<Window x:Class="WpfTutorialSamples.Styles.ControlSpecificStyleSample"
        xmlns="http://schemas.microsoft.com/winfx/2006/xaml/presentation"
        xmlns:x="http://schemas.microsoft.com/winfx/2006/xaml"
        Title="ControlSpecificStyleSample" Height="100" Width="300">
    <Grid Margin="10">
        <TextBlock Text="Style test">
            <TextBlock.Style>
                <Style>
                    <Setter Property="TextBlock.FontSize" Value="36" />
                </Style>
            </TextBlock.Style>
        </TextBlock>
    </Grid>
</Window>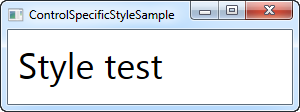
இந்த எடுத்துக்காட்டில், இந்த குறிப்பிட்ட உரை தடுப்பு கட்டுப்பாட்டை மட்டுமே பாணி பாதிக்கிறது. அதனால் என்ன? சரி, இந்த விஷயத்தில், இது எந்த பொருள் இல்லை. TextBlock கட்டுப்பாட்டில் ஒரு கூடுதல் எழுத்துரு சொத்துடன் அந்த கூடுதல் Markup-ப்பை நான் மாற்றியிருக்க முடியும். ஆனால் பின்னர் பார்ப்போம், பாணியானது பண்புகளை அமைப்பதை விட சற்று அதிகமாக செய்ய முடியும். உதாரணமாக, பாணி தூண்டுதல்கள் நிஜ பயன்பாட்டில் மேற்கண்ட உதாரணத்தை பயனுள்ளதாக மாற்றக்கூடும். இருப்பினும், நீங்கள் வரையறுக்கும் பெரும்பாலான பாணிகள் அதிக எல்லையில் இருக்கும்.
உள்ளக சேய் கட்டுப்பாடு பாணி
Using the Resources section of a control, you can target child controls of this control (and child controls of those child controls and so on). This is basically what we did in the introduction example in the last chapter, which looked like this:
<Window x:Class="WpfTutorialSamples.Styles.SimpleStyleSample"
        xmlns="http://schemas.microsoft.com/winfx/2006/xaml/presentation"
        xmlns:x="http://schemas.microsoft.com/winfx/2006/xaml"
        Title="SimpleStyleSample" Height="200" Width="250">
    <StackPanel Margin="10">
        <StackPanel.Resources>
            <Style TargetType="TextBlock">
                <Setter Property="Foreground" Value="Gray" />
                <Setter Property="FontSize" Value="24" />
            </Style>
        </StackPanel.Resources>
        <TextBlock>Header 1</TextBlock>
        <TextBlock>Header 2</TextBlock>
        <TextBlock Foreground="Blue">Header 3</TextBlock>
    </StackPanel>
</Window>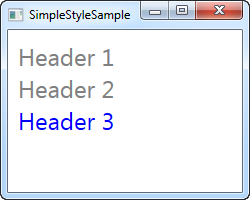
உள்ளக Style தேவைகளுக்கு இது சிறந்தது. உதாரணமாக, ஒரு உரையாடலில் இதைச் செய்வது சரியான அர்த்தத்தைத் தரும், அவை ஒவ்வொன்றிலும் தனிப்பட்ட பண்புகளை அமைப்பதற்கு பதிலாக, அங்கு உங்களுக்கு ஒரே மாதிரியான கட்டுப்பாடுகள் தேவை.
Window-முழுக்க பாணி
அடுத்த பணி படி Window வளங்களுக்குள் பாணி(களை) வரையறுப்பதாகும். இது மேலே உள்ளதைப் போலவே StackPanelக்கு செய்யப்படுகிறது, ஆனால் Window-வில் உள்ள அனைத்து கட்டுப்பாடுகளுக்கும் ஒரு குறிப்பிட்ட பாணி பொருந்தும் சூழ்நிலைகளில் இது பயனுள்ளதாக இருக்கும் (அல்லது அந்த விஷயத்தில் ஒரு UserControl). ஒரு குறிப்பிட்ட கட்டுப்பாட்டுக்குள் உள்ளிருப்பு மட்டுமல்ல. மாற்றியமைக்கப்பட்ட உதாரணம் இங்கே:
<Window x:Class="WpfTutorialSamples.Styles.WindowWideStyleSample"
        xmlns="http://schemas.microsoft.com/winfx/2006/xaml/presentation"
        xmlns:x="http://schemas.microsoft.com/winfx/2006/xaml"
        Title="WindowWideStyleSample" Height="200" Width="300">
    <Window.Resources>
        <Style TargetType="TextBlock">
            <Setter Property="Foreground" Value="Gray" />
            <Setter Property="FontSize" Value="24" />
        </Style>
    </Window.Resources>
    <StackPanel Margin="10">
        <TextBlock>Header 1</TextBlock>
        <TextBlock>Header 2</TextBlock>
        <TextBlock Foreground="Blue">Header 3</TextBlock>
    </StackPanel>
</Window>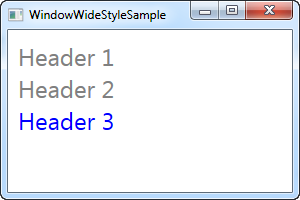
நீங்கள் பார்பது போல , முடிவு அதே தான். ஆனால் Window-க்குள் எல்லா இடங்களிலும் நீங்கள் கட்டுப்பாடுகளை வைத்திருக்க முடியும் என்று அர்த்தம் மற்றும் பாணி இன்னும் செயல்படும்.
Application-முழுக்க பாணி
வெவ்வேறு Window-க்களில் உங்கள் பாணிகள் முழுவதும் பயன்படுத்தப்பட விரும்பினால், முழு Application-க்கும் நீங்கள் அதை வரையறுக்கலாம். Visual Studio உங்களுக்காக உருவாக்கிய App.xaml கோப்பில் இது இதை செய்யவேண்டும். இது Window-முழுக்க பாணி அளவிலான எடுத்துக்காட்டு போலவே நடக்கும்.
App.xaml
<Application x:Class="WpfTutorialSamples.App"
             xmlns="http://schemas.microsoft.com/winfx/2006/xaml/presentation"
             xmlns:x="http://schemas.microsoft.com/winfx/2006/xaml"
	 StartupUri="Styles/WindowWideStyleSample.xaml">
    <Application.Resources>
        <Style TargetType="TextBlock">
            <Setter Property="Foreground" Value="Gray" />
            <Setter Property="FontSize" Value="24" />
        </Style>
    </Application.Resources>
</Application>
Window
<Window x:Class="WpfTutorialSamples.Styles.WindowWideStyleSample"
        xmlns="http://schemas.microsoft.com/winfx/2006/xaml/presentation"
        xmlns:x="http://schemas.microsoft.com/winfx/2006/xaml"
        Title="ApplicationWideStyleSample" Height="200" Width="300">
    <StackPanel Margin="10">
        <TextBlock>Header 1</TextBlock>
        <TextBlock>Header 2</TextBlock>
        <TextBlock Foreground="Blue">Header 3</TextBlock>
    </StackPanel>
</Window>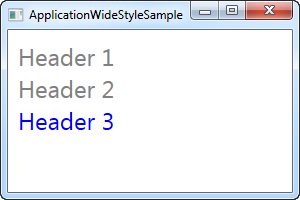
வெளிப்படையாக பாணியைப் பயன்படுத்துதல்
உள்ளக பாணிகளிலிருந்து மற்றும் Application அளவிலான பாணிகள் வரை, உங்கள் கட்டுப்பாடுகளுக்கு எப்படி, எங்கு Style பயன்படுத்துவது என்பதில் உங்களுக்கு நிறைய கட்டுப்பாடு உள்ளது. இது உங்கள் பயன்பாடு முழுவதும் சீரான தோற்றத்தைப் பெற உதவும், ஆனால் இதுவரை, எங்கள் பாணிகள் அனைத்தும் ஒரு குறிப்பிட்ட கட்டுப்பாட்டு வகையை குறிவைத்துள்ளன. இந்த கட்டுப்பாடுகள் அனைத்தும் அதைப் பயன்படுத்தின. இது அப்படி இருக்க வேண்டிய அவசியம் இல்லை.
By setting the x:Key property on a style, you are telling WPF that you only want to use this style when you explicitly reference it on a specific control. Let's try an example where this is the case:
<Window x:Class="WpfTutorialSamples.Styles.ExplicitStyleSample"
        xmlns="http://schemas.microsoft.com/winfx/2006/xaml/presentation"
        xmlns:x="http://schemas.microsoft.com/winfx/2006/xaml"
        Title="ExplicitStyleSample" Height="150" Width="300">
    <Window.Resources>
        <Style x:Key="HeaderStyle" TargetType="TextBlock">
            <Setter Property="Foreground" Value="Gray" />
            <Setter Property="FontSize" Value="24" />
        </Style>
    </Window.Resources>
    <StackPanel Margin="10">
        <TextBlock>Header 1</TextBlock>
        <TextBlock Style="{StaticResource HeaderStyle}">Header 2</TextBlock>
        <TextBlock>Header 3</TextBlock>
    </StackPanel>
</Window>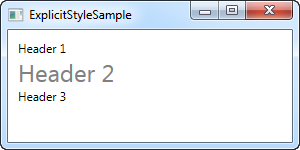
Notice how even though the TargetType is set to TextBlock, and the style is defined for the entire window, only the TextBlock in the middle, where I explicitly reference the HeaderStyle style, uses the style. This allows you to define styles that target a specific control type, but only use it in the places where you need it.
Summary
WPF styling allows you to easily re-use a certain look for your controls all over the application. Using the x:Key property, you can decide whether a style should be explicitly referenced to take effect, or if it should target all controls no matter what.