This article is currently in the process of being translated into Korean (~23% done).
Trigger, DataTrigger & EventTrigger
지금까지 우리는 특정 property에 대한 static value를 설정함으로써 styles를 사용했습니다. 그러나, 트리거를 사용하면 당신은 특정 조건이 변경될 때 주어진 속성의 값을 변경할 수 있습니다. 트리거는 Property 트리거, Event 트리거, Data 트리거로 여러 형태가 있습니다. 그것들은 style과 코드를 분리하는 과정 중 일부로 보통 code-behind에서 작성해야할 일들을 xaml에서 완전히 대체할 수 있도록 해줍니다.
Property trigger
The most common trigger is the property trigger, which in markup is simply defined with a <Trigger> element. It watches a specific property on the owner control and when that property has a value that matches the specified value, properties can change. In theory this might sound a bit complicated, but it's actually quite simple once we turn theory into an example:
<Window x:Class="WpfTutorialSamples.Styles.StyleTriggersSample"
        xmlns="http://schemas.microsoft.com/winfx/2006/xaml/presentation"
        xmlns:x="http://schemas.microsoft.com/winfx/2006/xaml"
        Title="StyleTriggersSample" Height="100" Width="300">
    <Grid>
        <TextBlock Text="Hello, styled world!" FontSize="28" HorizontalAlignment="Center" VerticalAlignment="Center">
            <TextBlock.Style>
                <Style TargetType="TextBlock">
                    <Setter Property="Foreground" Value="Blue"></Setter>
                    <Style.Triggers>
                        <Trigger Property="IsMouseOver" Value="True">
                            <Setter Property="Foreground" Value="Red" />
                            <Setter Property="TextDecorations" Value="Underline" />
                        </Trigger>
                    </Style.Triggers>
                </Style>
            </TextBlock.Style>
        </TextBlock>
    </Grid>
</Window>
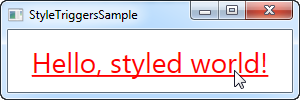
In this style, we set the Foreground property to blue, to make it look like a hyperlink. We then add a trigger, which listens to theIsMouseOver property - once this property changes to True, we apply two setters: We change the Foreground to red and then we make it underlined. This is a great example on how easy it is to use triggers to apply design changes, completely without any code-behind code.
We define a local style for this specific TextBlock, but as shown in the previous articles, the style could have been globally defined as well, if we wanted it to apply to all TextBlock controls in the application.
Data triggers
Data triggers, represented by the <DataTrigger> element, are used for properties that are not necessarily dependency properties. They work by creating a binding to a regular property, which is then monitored for changes. This also opens up for binding your trigger to a property on a different control. For instance, consider the following example:
<Window x:Class="WpfTutorialSamples.Styles.StyleDataTriggerSample"
        xmlns="http://schemas.microsoft.com/winfx/2006/xaml/presentation"
        xmlns:x="http://schemas.microsoft.com/winfx/2006/xaml"
        Title="StyleDataTriggerSample" Height="200" Width="200">
    <StackPanel HorizontalAlignment="Center" VerticalAlignment="Center">
        <CheckBox Name="cbSample" Content="Hello, world?" />
        <TextBlock HorizontalAlignment="Center" Margin="0,20,0,0" FontSize="48">
            <TextBlock.Style>
                <Style TargetType="TextBlock">
                    <Setter Property="Text" Value="No" />
                    <Setter Property="Foreground" Value="Red" />
                    <Style.Triggers>
                        <DataTrigger Binding="{Binding ElementName=cbSample, Path=IsChecked}" Value="True">
                            <Setter Property="Text" Value="Yes!" />
                            <Setter Property="Foreground" Value="Green" />
                        </DataTrigger>
                    </Style.Triggers>
                </Style>
            </TextBlock.Style>
        </TextBlock>
    </StackPanel>
</Window>
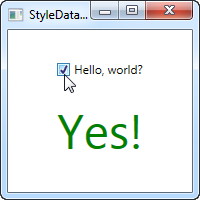
In this example, we have a CheckBox and a TextBlock. Using a DataTrigger, we bind the TextBlock to the IsChecked property of the CheckBox. We then supply a default style, where the text is "No" and the foreground color is red, and then, using a DataTrigger, we supply a style for when the IsChecked property of the CheckBox is changed to True, in which case we make it green with a text saying "Yes!" (as seen on the screenshot).
Event triggers
이벤트트리거는 EventTrigger를 사용하여 조작할수있다. 이벤트트리거는 발생된 이벤트에 대응하여 애니메이션을 시작하는데 사용된다. 우리는 아직 애니메이션에대해 공부하지 않았지만 이벤트트리거가 어떻게 동작하기위해서 언급이 필요하다. 자세한내용을 위해서는 애니매이션 챕터를 보아라
<Window x:Class="WpfTutorialSamples.Styles.StyleEventTriggerSample"
        xmlns="http://schemas.microsoft.com/winfx/2006/xaml/presentation"
        xmlns:x="http://schemas.microsoft.com/winfx/2006/xaml"
        Title="StyleEventTriggerSample" Height="100" Width="300">
    <Grid>
        <TextBlock Name="lblStyled" Text="Hello, styled world!" FontSize="18" HorizontalAlignment="Center" VerticalAlignment="Center">
            <TextBlock.Style>
                <Style TargetType="TextBlock">
                    <Style.Triggers>
                        <EventTrigger RoutedEvent="MouseEnter">
                            <EventTrigger.Actions>
                                <BeginStoryboard>
                                    <Storyboard>
                                        <DoubleAnimation Duration="0:0:0.300" Storyboard.TargetProperty="FontSize" To="28" />
                                    </Storyboard>
                                </BeginStoryboard>
                            </EventTrigger.Actions>
                        </EventTrigger>
                        <EventTrigger RoutedEvent="MouseLeave">
                            <EventTrigger.Actions>
                                <BeginStoryboard>
                                    <Storyboard>
                                        <DoubleAnimation Duration="0:0:0.800" Storyboard.TargetProperty="FontSize" To="18" />
                                    </Storyboard>
                                </BeginStoryboard>
                            </EventTrigger.Actions>
                        </EventTrigger>
                    </Style.Triggers>
                </Style>
            </TextBlock.Style>
        </TextBlock>
    </Grid>
</Window>
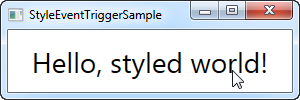
위의 소스코드가 많아보일지 모르겠지만 위 코드샘플을 실행시키면 당신은 꽤 멋진 애니메이션을 확인할 수 있다. 나는MouseEnter와 MouseLeave를 설명하기 위해서 EventTrigger를 사용하였다. 마우스가 콘트롤영역에 진입하면 300밀리초안에 28픽셀의 모양으로 애니메이션이 된다. 마우스가 콘트롤영역을 떠나면 18픽셀의 글자로 약간 느리게 변화되도록만들었다 그렇게 만든 이유는 조금더 멋저보이는것 같아서이다.
Summary
WPF styles make it easy to get a consistent look, and with triggers, this look becomes dynamic. Styles are great in your application, but they're even better when used in control templates etc. You can read more about that elsewhere in this tutorial.
In the next article, we'll look at multi triggers, which allow us to apply styles based on multiple properties.