The community is working on translating this tutorial into Romanian, but it seems that no one has started the translation process for this article yet. If you can help us, then please click "More info".
Trigger animations
One of the things that became a LOT easier with WPF, compared to previous frameworks like WinForms, is animation. Triggers have direct support for using animations in response to the trigger being fired, instead of just switching between two static values.
For this, we use the EnterActions and ExitActions properties, which are present in all of the trigger types already discussed (except for the EventTrigger), both single and multiple. Here's an example:
<Window x:Class="WpfTutorialSamples.Styles.StyleTriggerEnterExitActions"
        xmlns="http://schemas.microsoft.com/winfx/2006/xaml/presentation"
        xmlns:x="http://schemas.microsoft.com/winfx/2006/xaml"
        Title="StyleTriggerEnterExitActions" Height="200" Width="200" UseLayoutRounding="True">
    <Grid>
        <Border Background="LightGreen" Width="100" Height="100" BorderBrush="Green">
            <Border.Style>
                <Style TargetType="Border">
                    <Style.Triggers>
                        <Trigger Property="IsMouseOver" Value="True">
                            <Trigger.EnterActions>
                                <BeginStoryboard>
                                    <Storyboard>
                                        <ThicknessAnimation Duration="0:0:0.400" To="3" Storyboard.TargetProperty="BorderThickness" />
                                        <DoubleAnimation Duration="0:0:0.300" To="125" Storyboard.TargetProperty="Height" />
                                        <DoubleAnimation Duration="0:0:0.300" To="125" Storyboard.TargetProperty="Width" />
                                    </Storyboard>
                                </BeginStoryboard>
                            </Trigger.EnterActions>
                            <Trigger.ExitActions>
                                <BeginStoryboard>
                                    <Storyboard>
                                        <ThicknessAnimation Duration="0:0:0.250" To="0" Storyboard.TargetProperty="BorderThickness" />
                                        <DoubleAnimation Duration="0:0:0.150" To="100" Storyboard.TargetProperty="Height" />
                                        <DoubleAnimation Duration="0:0:0.150" To="100" Storyboard.TargetProperty="Width" />
                                    </Storyboard>
                                </BeginStoryboard>
                            </Trigger.ExitActions>
                        </Trigger>
                    </Style.Triggers>
                </Style>
            </Border.Style>
        </Border>
    </Grid>
</Window>

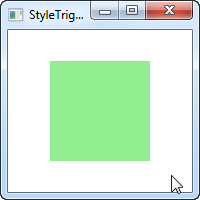
In this example, we have a green square. It has a trigger that fires once the mouse is over, in which case it fires of several animations, all defined in the EnterActions part of the trigger. In there, we animate the thickness of the border from its default 0 to a thickness of 3, and then we animate the width and height from 100 to 125. This all happens simultaneously, because they are a part of the same StoryBoard, and even at slightly different speeds, since we have full control of how long each animation should run.
We use the ExitActions to reverse the changes we made, with animations that goes back to the default values. We run the reversing animations slightly faster, because we can and because it looks cool.
The two states are represented on the two screenshots, but to fully appreciate the effect, you should try running the example on your own machine, using the source code above.
Summary
Using animations with style triggers is very easy, and while we haven't fully explored all you can do with WPF animations yet, the example used above should give you an idea on just how flexible both animations and styles are.