The community is working on translating this tutorial into Uzbek, but it seems that no one has started the translation process for this article yet. If you can help us, then please click "More info".
In this article series, we're building a complete Snake game from scratch. It makes sense to start with the Introduction and then work your way through the articles one by one, to get the full understanding.
If you want to get the complete source code for the game at once, to get started modifying and learning from it right now, consider downloading all our samples!
Creating the game area
To create our SnakeWPF game, we'll start by creating the map. It will be a confined area, where the snake has to move within - a snake pit, if you will. I have decided that my snake pit should look like a chess board, made up equally sized squares, which will have the same dimensions as the body of the snake. We'll create the map in two iterations: Some of it will be laid out in XAML, because it's easy, while we'll draw the background squares in Code-behind, because it's repetitive and dynamic.
Game area XAML
So, let's start with the XAML - a simple Window with Canvas panel inside of a Border control, to create the confined area:
<Window x:Class="WpfTutorialSamples.Games.SnakeWPFSample"
    xmlns="http://schemas.microsoft.com/winfx/2006/xaml/presentation"
    xmlns:x="http://schemas.microsoft.com/winfx/2006/xaml"
    xmlns:d="http://schemas.microsoft.com/expression/blend/2008"
    xmlns:mc="http://schemas.openxmlformats.org/markup-compatibility/2006"
    xmlns:local="clr-namespace:WpfTutorialSamples.Games"
    mc:Ignorable="d"
    Title="SnakeWPF - Score: 0" SizeToContent="WidthAndHeight">
    <Border BorderBrush="Black" BorderThickness="5">
    <Canvas Name="GameArea" ClipToBounds="True" Width="400" Height="400">

    </Canvas>
    </Border>
</Window>
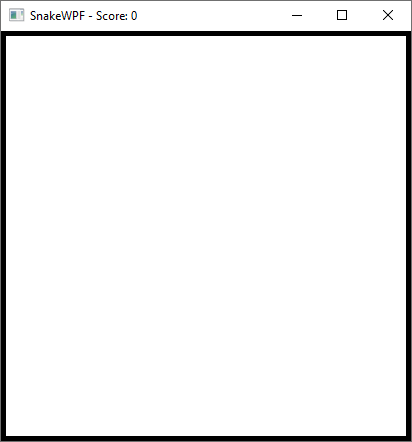
Our game now looks like this:

We use a Canvas as the actual game area, because it will allow us to add controls to it where we get full control of the positions. We'll use that later, but for now, pay attention to the following things:
- No width/height is defined for the Window - instead, we defined it for the Canvas, because that's the part we need to fully control. We then make sure that the Window will adjust its size accordingly by setting the SizeToContent property to WidthAndHeight. Had we instead defined the width/height for the Window, the available space within it would depend on how much border the Operating System used for Windows, which could depend on themes etc.
- We set the ClipToBounds property to True for the Canvas - this is important, because otherwise the controls we add would be able to expand beyond the boundaries of the Canvas panel
Drawing the background from Code-behind
As mentioned, I want a checkerboard background for the game area. It consists of a lot of squares, so it's easier to add it from Code-behind (or to use an image, but that's not as dynamic!). We need to do this as soon as all controls inside the Window has been initialized/rendered, and fortunately for us, the Window has an event for that: The ContentRendered event. We'll subscribe to that in the Window declaration:
Title="SnakeWPF - Score: 0" SizeToContent="WidthAndHeight" ContentRendered="Window_ContentRendered"Now move to Code-behind and let's get started. First of all, we need to define a size to use when drawing the snake, the background squares etc. It can be done in the top of your Window class:
public partial class SnakeWPFSample : Window
{
    const int SnakeSquareSize = 20;
    .....
Now, in our ContentRendered event we'll call the DrawGameArea() method, which will do all the hard work. It looks like this:
private void Window_ContentRendered(object sender, EventArgs e)
{
    DrawGameArea();
}

private void DrawGameArea()
{
    bool doneDrawingBackground = false;
    int nextX = 0, nextY = 0;
    int rowCounter = 0;
    bool nextIsOdd = false;

    while(doneDrawingBackground == false)
    {
    Rectangle rect = new Rectangle
    {
        Width = SnakeSquareSize,
        Height = SnakeSquareSize,
        Fill = nextIsOdd ? Brushes.White : Brushes.Black
    };
    GameArea.Children.Add(rect);
    Canvas.SetTop(rect, nextY);
    Canvas.SetLeft(rect, nextX);

    nextIsOdd = !nextIsOdd;
    nextX += SnakeSquareSize;
    if(nextX >= GameArea.ActualWidth)
    {
        nextX = 0;
        nextY += SnakeSquareSize;
        rowCounter++;
        nextIsOdd = (rowCounter % 2 != 0);
    }

    if(nextY >= GameArea.ActualHeight)
        doneDrawingBackground = true;
    }
}
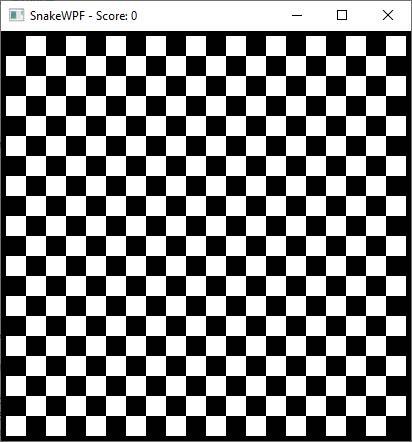
As previously mentioned, these articles requires a bit more C# knowledge than the rest of the articles in this tutorial, so I won't go over each line, but here's a general description of what we do: Inside the while loop, we continuously create instances of the Rectangle control and add it to the Canvas (GameArea). We fill it with either a White or a Black Brush, and it uses our SnakeSquareSize constant as both Width and Height, since we want it to be a square. On each iteration, we use the nextX and nextY to control when to move to the next line (when we reach the right border) and when to stop (when we reach the bottom AND the right border at the same time).
Here's the result:

Summary
In this article, we have defined the XAML used to host all the game content, and we have "painted" a checkerboard pattern on the game area, by adding WPF Rectangle controls in black and white to it. The next step will be to start adding the actual snake, as well as the food it will be eating.