This article has been localized into Korean by the community.
Grid를 이용한 주소록 form
이전의 몇몇 챕터에서 우리는 많은 정보를 설명했고, 각각에 이론적인 예를 살펴 보았습니다. 이번 챕터에서는 지금까지 Grid에 대해 배웠던 것을 현실 프로그램에서 사용할 수있는 예로, 간단한 연락처 형식을 만들어 봅니다.
주소록 양식에 대한 좋은 점은 일반적으로 사용되는 화면의 예일 뿐이지만, 여기에 사용된 기술을 사용하면 만들어야 하는 거의 모든 유형의 화면에 적용 할 수 있습니다.
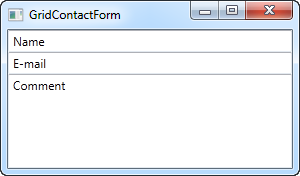
이 작업을 처음 수행하는 것은 매우 간단하며 매우 기본적인 주소록 양식을 보여줍니다. 여기서는 3개의 행을 사용하는데 그 중 2개는 Auto Height가 있고 나머지 하나는 별표 높이가 있으므로 이것은 Auto Height를 제외한 나머지 공간을 사용합니다.
<Window x:Class="WpfTutorialSamples.Panels.GridContactForm"
        xmlns="http://schemas.microsoft.com/winfx/2006/xaml/presentation"
        xmlns:x="http://schemas.microsoft.com/winfx/2006/xaml"
        Title="GridContactForm" Height="300" Width="300">
    <Grid>
		<Grid.RowDefinitions>
			<RowDefinition Height="Auto" />
			<RowDefinition Height="Auto" />
			<RowDefinition Height="*" />
		</Grid.RowDefinitions>
		<TextBox>Name</TextBox>
		<TextBox Grid.Row="1">E-mail</TextBox>
		<TextBox Grid.Row="2" AcceptsReturn="True">Comment</TextBox>
	</Grid>
</Window>
보시다시피, 마지막 TextBox는 단순히 나머지 공간을 차지하고 처음 두 개는 필요한 공간을 차지합니다. 창의 크기를 조정하면 comment를 표시하는 크기가 조정된 세번째 TextBox가 표시됩니다.
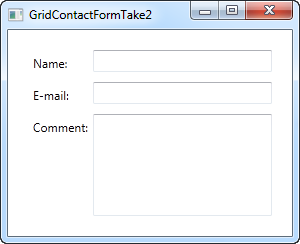
이 간단한 예제에서는 각 필드의 용도를 지정하는 레이블이 없습니다. 대신 설명 텍스트는 TextBox 내부에 있지만 일반적인 Windows 대화 상자의 모양이 아닙니다. 모양과 유용성을 약간 개선해 봅시다.
<Window x:Class="WpfTutorialSamples.Panels.GridContactFormTake2"
        xmlns="http://schemas.microsoft.com/winfx/2006/xaml/presentation"
        xmlns:x="http://schemas.microsoft.com/winfx/2006/xaml"
        Title="GridContactFormTake2" Height="300" Width="300">
	<Grid Margin="10">
		<Grid.ColumnDefinitions>
			<ColumnDefinition Width="Auto" />
			<ColumnDefinition Width="*" />
		</Grid.ColumnDefinitions>
		<Grid.RowDefinitions>
			<RowDefinition Height="Auto" />
			<RowDefinition Height="Auto" />
			<RowDefinition Height="*" />
		</Grid.RowDefinitions>
		<Label>Name: </Label>
		<TextBox Grid.Column="1" Margin="0,0,0,10" />
		<Label Grid.Row="1">E-mail: </Label>
		<TextBox Grid.Row="1" Grid.Column="1" Margin="0,0,0,10" />
		<Label Grid.Row="2">Comment: </Label>
		<TextBox Grid.Row="2" Grid.Column="1" AcceptsReturn="True" />
	</Grid>
</Window>
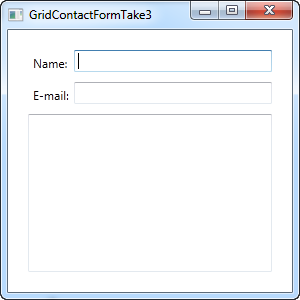
그러나 아마도 여러분은 코멘트 필드인 경우 설명이 필요없다 생각할 수도 있습니다. 이 경우 레이블을 건너 뛰고 ColumnSpan을 사용하여 주석 TextBox를위한 더 많은 공간을 확보합시다.
<TextBox Grid.ColumnSpan="2" Grid.Row="2" AcceptsReturn="True" />
보시다시피 Grid는 매우 강력한 패널입니다. 화면을 디자인 할 때 이러한 모든 기술을 사용할 수 있기를 바랍니다.