This article is currently in the process of being translated into Urdu (~24% done).
Hello, WPF!
تقریباً ہر پروگرامنگ tutorial میں پہلی اور روایتی مثال "Hello, World" کی ہوتی ہے۔ لیکن اس tutorial میں ہم خبطی بن کر اسے "!Hello, WPF" سے بدل دیں گے۔ ہماری کوشش صرف یہ ہوگی کہ الفاظ کا یہ مجموعہ سکرین پر لا کر آپ کو یہ دیکھائیں کہ اسے شروع کرنا کتنا آسان ہے۔
بقیہ سبق میں یہ فرض کیا گیا ہے کہ آپ نے کوئی IDE انسٹال کی ہوئی ہے, ترجیحی طور پر Visual Studio یا Visual Studio Community (انہیں حاصل کرنے کے لیے ہدایات کے لیے پچھلا مضمون دیکھیں)۔ اگر آپ کوئی اور مصنوعات استعمال کر رہے ہیں تو ان ہدایات کو اپنی مصنوعات کے مطابق ڈھال لیں۔
In Visual Studio, start by selecting New project from the File menu. On the left, you should have a tree of categories. This tutorial will focus on C# whenever code is involved, so you should select that from the list of templates, and since we'll be creating Windows applications, you should select Windows from the tree. This will give you a list of possible Windows application types to the right, where you should select a WPF Application. I named my project "HelloWPF" in the Name text field. Make sure that the rest of the settings in the bottom part of the dialog are okay and then press the Ok button.
Your new project will have a couple of files, but we will focus on just one of them now: MainWindow.xaml. This is the applications primary window, the one shown first when launching the application, unless you specifically change this. The XAML code found in it (XAML is discussed in details in another chapter of this tutorial) should look something like this:
<Window x:Class="WpfApplication1.MainWindow"
    xmlns="http://schemas.microsoft.com/winfx/2006/xaml/presentation"
    xmlns:x="http://schemas.microsoft.com/winfx/2006/xaml"
    Title="MainWindow" Height="350" Width="525">
    <Grid>

    </Grid>
</Window>
This is the base XAML that Visual Studio creates for our window, all parts of it explained in the chapters on XAML and "The Window". You can actually run the application now (select Debug -> Start debugging or press F5) to see the empty window that our application currently consists of, but now it's time to get our message on the screen.
We'll do it by adding a TextBlock control to the Grid panel, with our aforementioned message as the content:
<Window x:Class="WpfApplication1.MainWindow"
    xmlns="http://schemas.microsoft.com/winfx/2006/xaml/presentation"
    xmlns:x="http://schemas.microsoft.com/winfx/2006/xaml"
    Title="MainWindow" Height="350" Width="525">
    <Grid>
        <TextBlock HorizontalAlignment="Center" VerticalAlignment="Center" FontSize="72">
            Hello, WPF!
        </TextBlock>
    </Grid>
</Window>
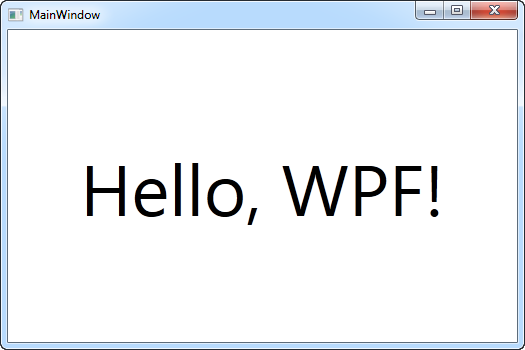
Try running the application now (select Debug -> Start debugging or press F5) and see the beautiful result of your hard work - your first WPF application:

You will notice that we used three different attributes on the TextBlock to get a custom alignment (in the middle of the window), as well the FontSize property to get bigger text. All of these concepts will be treated in later articles.
Congratulations on making it this far. Now go read the rest of the tutorial and soon you will master WPF!