The community is working on translating this tutorial into Swedish, but it seems that no one has started the translation process for this article yet. If you can help us, then please click "More info".
The SaveFileDialog
The SaveFileDialog will help you select a location and a filename when you wish to save a file. It works and looks much like the OpenFileDialog which we used in the previous article, with a few subtle differences. Just like the OpenFileDialog, the SaveFileDialog is a wrapper around a common Windows dialog, meaning that your users will see roughly the same dialog whether they initiate it in your application or e.g. in Notepad.
Simple SaveFileDialog example
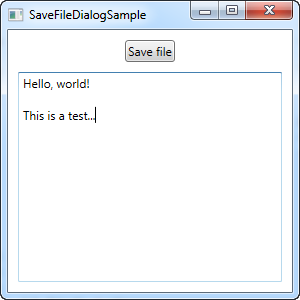
To kick things off, let's begin with a very simple example on using the SaveFileDialog:
<Window x:Class="WpfTutorialSamples.Dialogs.SaveFileDialogSample"
        xmlns="http://schemas.microsoft.com/winfx/2006/xaml/presentation"
        xmlns:x="http://schemas.microsoft.com/winfx/2006/xaml"
        Title="SaveFileDialogSample" Height="300" Width="300">
    <DockPanel Margin="10">
        <WrapPanel HorizontalAlignment="Center" DockPanel.Dock="Top" Margin="0,0,0,10">
            <Button Name="btnSaveFile" Click="btnSaveFile_Click">Save file</Button>
        </WrapPanel>
        <TextBox Name="txtEditor" TextWrapping="Wrap" AcceptsReturn="True" ScrollViewer.VerticalScrollBarVisibility="Auto" />
    </DockPanel>
</Window>
using System;
using System.IO;
using System.Windows;
using Microsoft.Win32;
namespace WpfTutorialSamples.Dialogs
{
public partial class SaveFileDialogSample : Window
{
public SaveFileDialogSample()
{
InitializeComponent();
}
private void btnSaveFile_Click(object sender, RoutedEventArgs e)
{
SaveFileDialog saveFileDialog = new SaveFileDialog();
if(saveFileDialog.ShowDialog() == true)
File.WriteAllText(saveFileDialog.FileName, txtEditor.Text);
}
}
}
As you can see, it's mostly about instantiating the SaveFileDialog and then calling the ShowDialog() method. If it returns true, we use the FileName property (which will contain the selected path as well as the user entered file name) as the path to write our contents to.
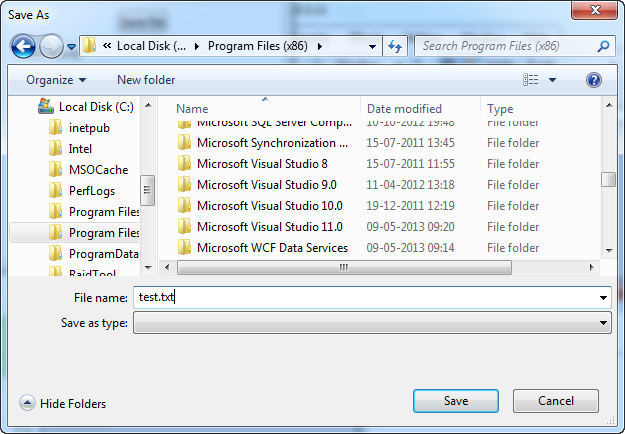
If you click the save button, you should see a dialog like this, depending on the version of Windows you're using:

Filter
As you can see from the first example, I manually added a .txt extension to my desired filename, mainly because the "Save as type" combo box is empty. Just like for the OpenFileDialog, this box is controlled through the Filter property, and it's also used in the exact same way.
saveFileDialog.Filter = "Text file (*.txt)|*.txt|C# file (*.cs)|*.cs";For more details about the format of the Filter property, please see the previous article on the OpenFileDialog, where it's explained in details.
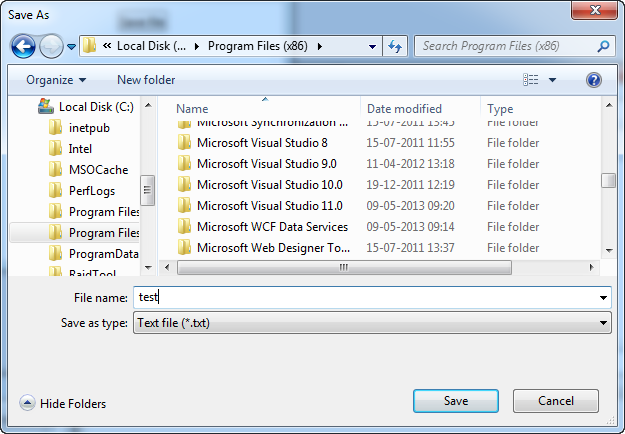
With a filter like the above, the resulting SaveFileDialog will look like this instead:

With that in place, you can write filenames without specifying the extension - it will be taken from the selected file type in the filter combo box instead. This also indicates to the user which file formats your application supports, which is of course important.
Setting the initial directory
The initial directory used by the SaveFileDialog is decided by Windows, but by using the InitialDirectory property, you can override it. You will usually set this value to a user specified directory, the application directory or perhaps just to the directory last used. You can set it to a path in a string format, like this:
saveFileDialog.InitialDirectory = @"c:\temp\";If you want to use one of the special folders on Windows, e.g. the Desktop, My Documents or the Program Files directory, you have to take special care, since these may vary from each version of Windows and also depend on which user is logged in. The .NET framework can help you though, just use the Environment class and its members for dealing with special folders:
saveFileDialog.InitialDirectory = Environment.GetFolderPath(Environment.SpecialFolder.MyDocuments);In this case, I get the path for the My Documents folder, but have a look at the SpecialFolder enumeration - it contains values for a lot of interesting paths. For a full list, please see this MSDN article.
Options
Besides the options already mentioned in this article, I want to draw your attention to the following properties, which will help you tailor the SaveFileDialog to your needs:
AddExtension - defaults to true and determines if the SaveFileDialog should automatically append an extension to the filename, if the user omits it. The extension will be based on the selected filter, unless that's not possible, in which case it will fall back to the DefaultExt property (if specified). If you want your application to be able to save files without file extensions, you may have to disable this option.
OverwritePrompt - defaults to true and determines if the SaveFileDialog should ask for a confirmation if the user enters a file name which will result in an existing file being overwritten. You will normally want to leave this option enabled except in very special situations.
Title - you may override this property if you want a custom title on your dialog. It defaults to "Save As" or the localized equivalent and the property is also valid for the OpenFileDialog.
ValidateNames - defaults to true and unless it's disabled, it will ensure that the user enters only valid Windows file names before allowing the user to continue.