This article has been localized into Czech by the community.
Grid - jednotky (units)
Zatím jsme k nastavování šířky a výšky nejvíce používali hvězdičkovou notaci, která říká, že sloupec či řádek má zabírat dané procento prostoru (je to relativní jednotka). WPF poskytuje ještě dva další způsoby nastavování šířky a výšky: absolutní jednotky a Auto. Pojďme vytvořit Grid, ve kterém využijeme všechny způsoby.
<Window x:Class="WpfTutorialSamples.Panels.GridUnits"
        xmlns="http://schemas.microsoft.com/winfx/2006/xaml/presentation"
        xmlns:x="http://schemas.microsoft.com/winfx/2006/xaml"
        Title="GridUnits" Height="200" Width="400">
	<Grid>
		<Grid.ColumnDefinitions>
			<ColumnDefinition Width="1*" />
			<ColumnDefinition Width="Auto" />
			<ColumnDefinition Width="100" />
		</Grid.ColumnDefinitions>
		<Button>Button 1</Button>
		<Button Grid.Column="1">Button 2 with long text</Button>
		<Button Grid.Column="2">Button 3</Button>
	</Grid>
</Window>
V tomto příkladu má levé tlačítko šířku nastavenou na 1*, prostřední má automatickou šířku a poslední má fixní šířku 100 pixelů
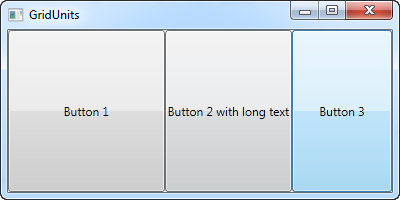
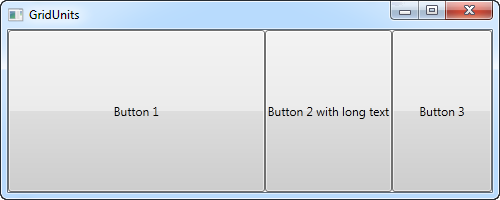
Výsledek je zobrazen na screenshotu, kde prostřední button zabírá přesně tolik prostoru, aby se do něj vešel text. Třetí button zabírá přesně 100 pixelů a ten první má variabilní šířku a je mu vyhrazen zbylý prostor.
V gridu může mít několik sloupců (či řádek) variabilní rozměr (hvězdičková notace). Tyto sloupce (či řádky) sdílí prostor, který nezabírají sloupce (či řádky) s fixním nebo automatickým rozměrem. Nejlépe si toho všimneme při změně velikosti okna.


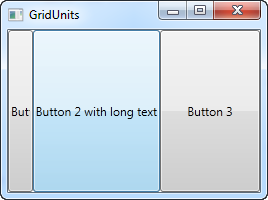
Na prvním snímku obrazovky uvidíte, že Grid si rezervuje místo pro poslední dvě tlačítka, i když to znamená, že první tlačítko nedostane veškerý prostor, který potřebuje pro správné vykreslení. Na druhém snímku obrazovky uvidíte, že poslední dvě tlačítka si udržují přesně stejné množství prostoru, nechávají přebytečný prostor prvnímu tlačítku.
Toto může být velmi užitečná technika při návrhu široké škály dialogů. Například si vezměte jednoduchý kontaktní formulář, kde uživatel zadává jméno, e-mailovou adresu a komentář. První dvě pole obvykle mají pevnou výšku, zatímco poslední by mohlo zabírat co nejvíce prostoru, aby zbylo místo pro psaní delšího komentáře. V jedné z příštích kapitol se pokusíme postavit kontaktní formulář s použitím Gridu - řádků a sloupců různých výšek a šířek.